Let’s Build an HRIS Application
How to build an Human Resources Information System (HRIS) example with Full Stack No Code Development. A customer approached us recently and described the following application:
- An Employee directory
- Tracks awards per employee
- Tracks recognitions per employee
- Tracks training hours per employee
- Tracks group applications per employee
- Tracks personnel documents per employee
- Has an employee portal where the employee can access and sometimes edit from the above
- Desire to upload spreadsheets to populate employee table
These requirements are pretty straightforward. Since we are building this using a “full stack” no code tool, we can think of these requirements in terms of concepts and a progression that full stack developers would normally follow. Learning to build applications in a full stack no code tool is essentially the same as learning to build them in a traditional coding environment…only without the code!
Step 1: Data Layer Development
The first thing to consider for this application are Tables, Fields and Relationships. Using CitizenDeveloper.com it’s very easy to create these data elements. Here is what we need to create:
Tables
Tables contain many records for which we store data about. While many no code tools will describe Tables using words like “collections”, the developer community ubiquitously uses the word “Table”, and so in full stack no code development we follow that convention. The Tables this application needs are:
| Table Name | Description |
|---|---|
| Employees | The main entity tracked by this application |
| Awards | List of awards assigned to employees |
| Recognitions | List of recognitions associated with employees |
| Training | List of trainings completed by employees |
| Group Applications | List of group applications made by employee |
| Documents | List of documents associated with an employee |
| Employee Record Uploads | Each spreadsheet upload will first be stored here. |
| Users | People who log into the application…both administrators and employees |
| Installation | A single record in the table for the development, testing and production installations, used to store installation specific data |
Relationships
Relationships explain how tables are connected. They are used to “join” two tables together to combine data from between tables. For example, if you want to track multiple job positions of an employee over time, you would use two tables to do that, employee and job position, and then you would relate the two tables together by saying “one employee can have many job positions”. You would add a time field on the job position so that the “over time” part of the relationship can also be tracked.
Table Name | Cardinality | Table Name |
|---|---|---|
Employee | 1 to many | Awards |
Employee | 1 to many | Recognitions |
Employee | 1 to many | Training |
Employee | 1 to many | Group Applications |
Employee | 1 to many | Documents |
Fields
Fields are associated with a Table, and are the actual elements of data stored about the record. We’ll start the Employee table here, but leave the other fields and other tables’ fields as an exercise. Because Fields store data in a technical database, they have a “type” so that the database best understands how to manage that particular set of values.
| Employee Table: Field Name | Field Type |
|---|---|
| First Name | Short text |
| Last Name | Short text |
| Date of Birth | Date |
| Current Address | Address |
| Mobile Phone Number | telephone |
| etc. | etc. |
Step 2: Presentation Layer Development
Presentation Layer Design, at its most basic, can be done almost entirely by looking at the Data Layer and modeling it using best practice interfaces.
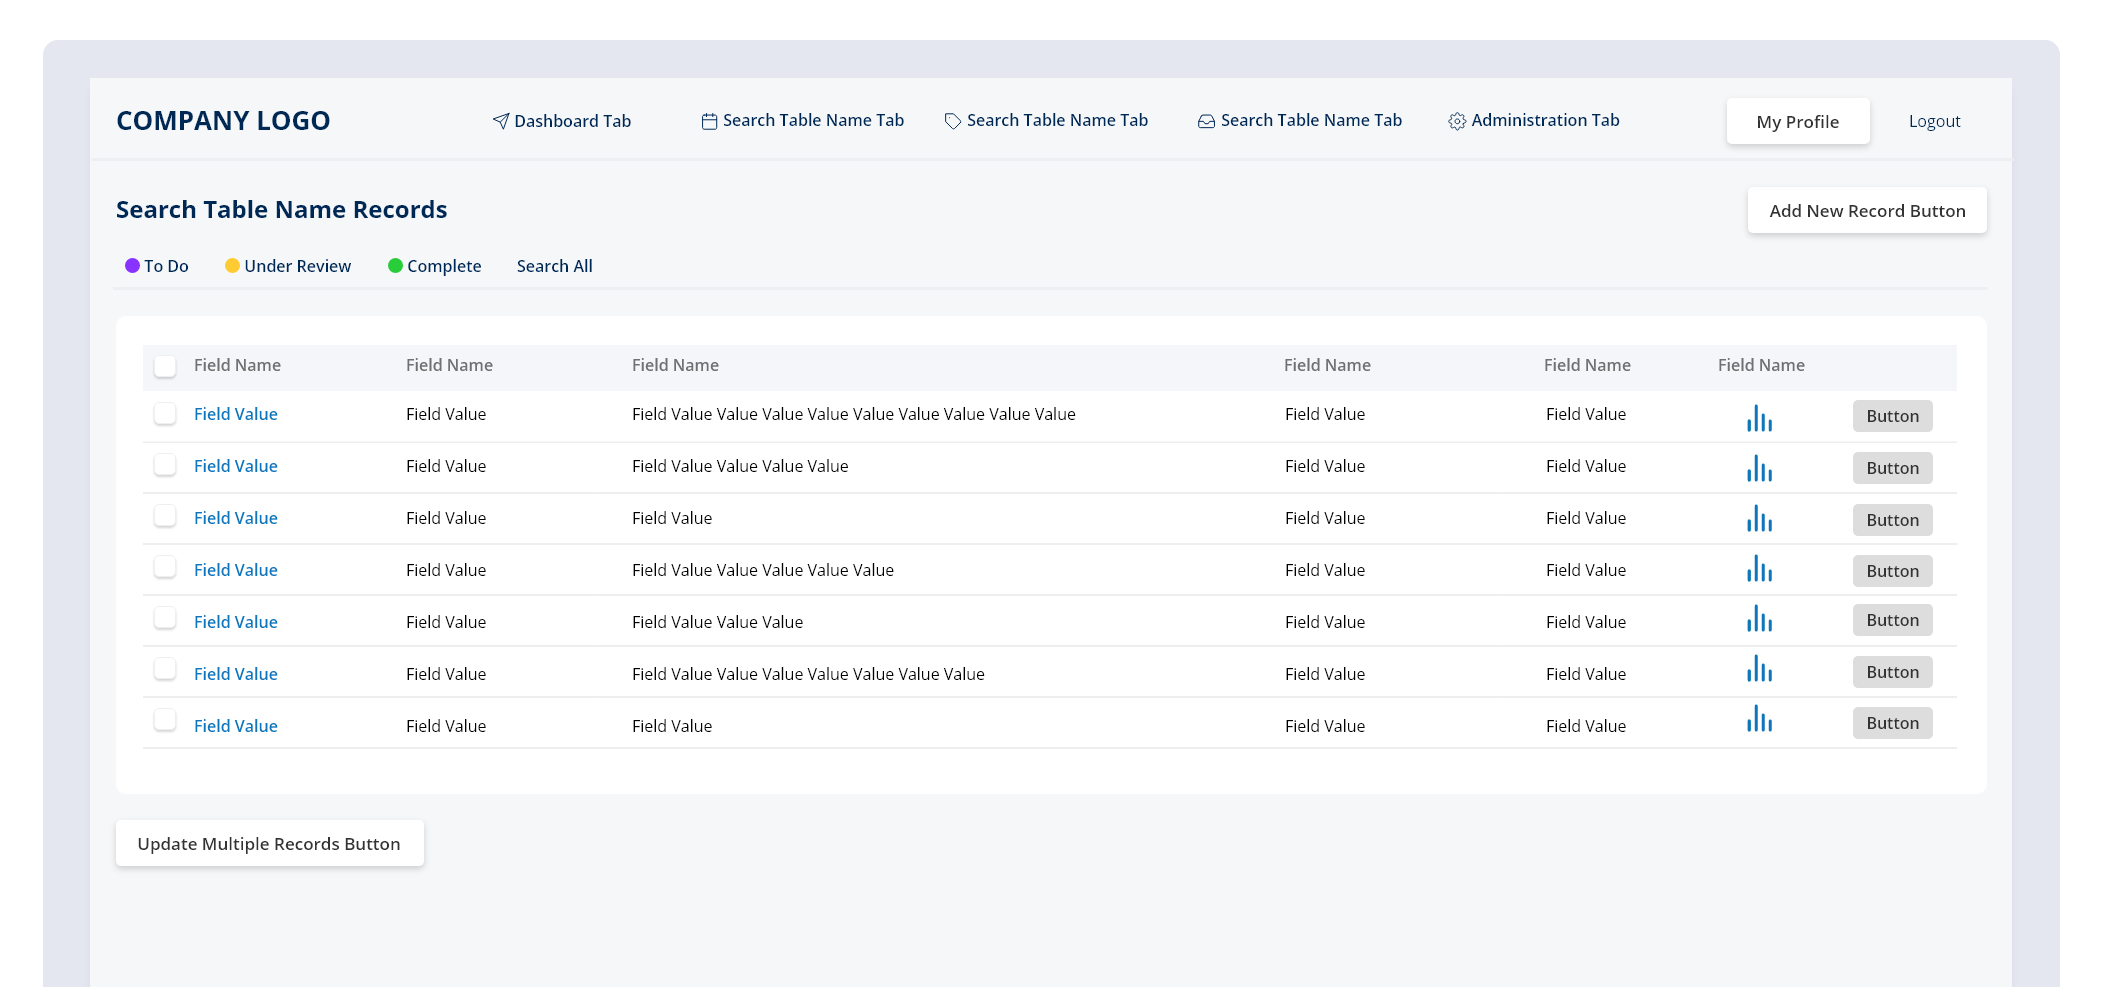
Top Navigation
A great best practice for this application, and many applications, is simply to use “top level tabs” as shown below:

You will create a single tab for each table, generally speaking. For tables that are only viewed by administrators, you can opt to skip placing a top level tab for that table, and instead bundle that tables interfaces into the administers area below. But otherwise, create a top level tab for each table.
Within each tab, you will put a “Search Page” for the given table (see below).
Search Pages
A great best practice is that for each table, you will have a single search page. On that search page, there will be an add button, and also a delete button, to add or delete records from the table.
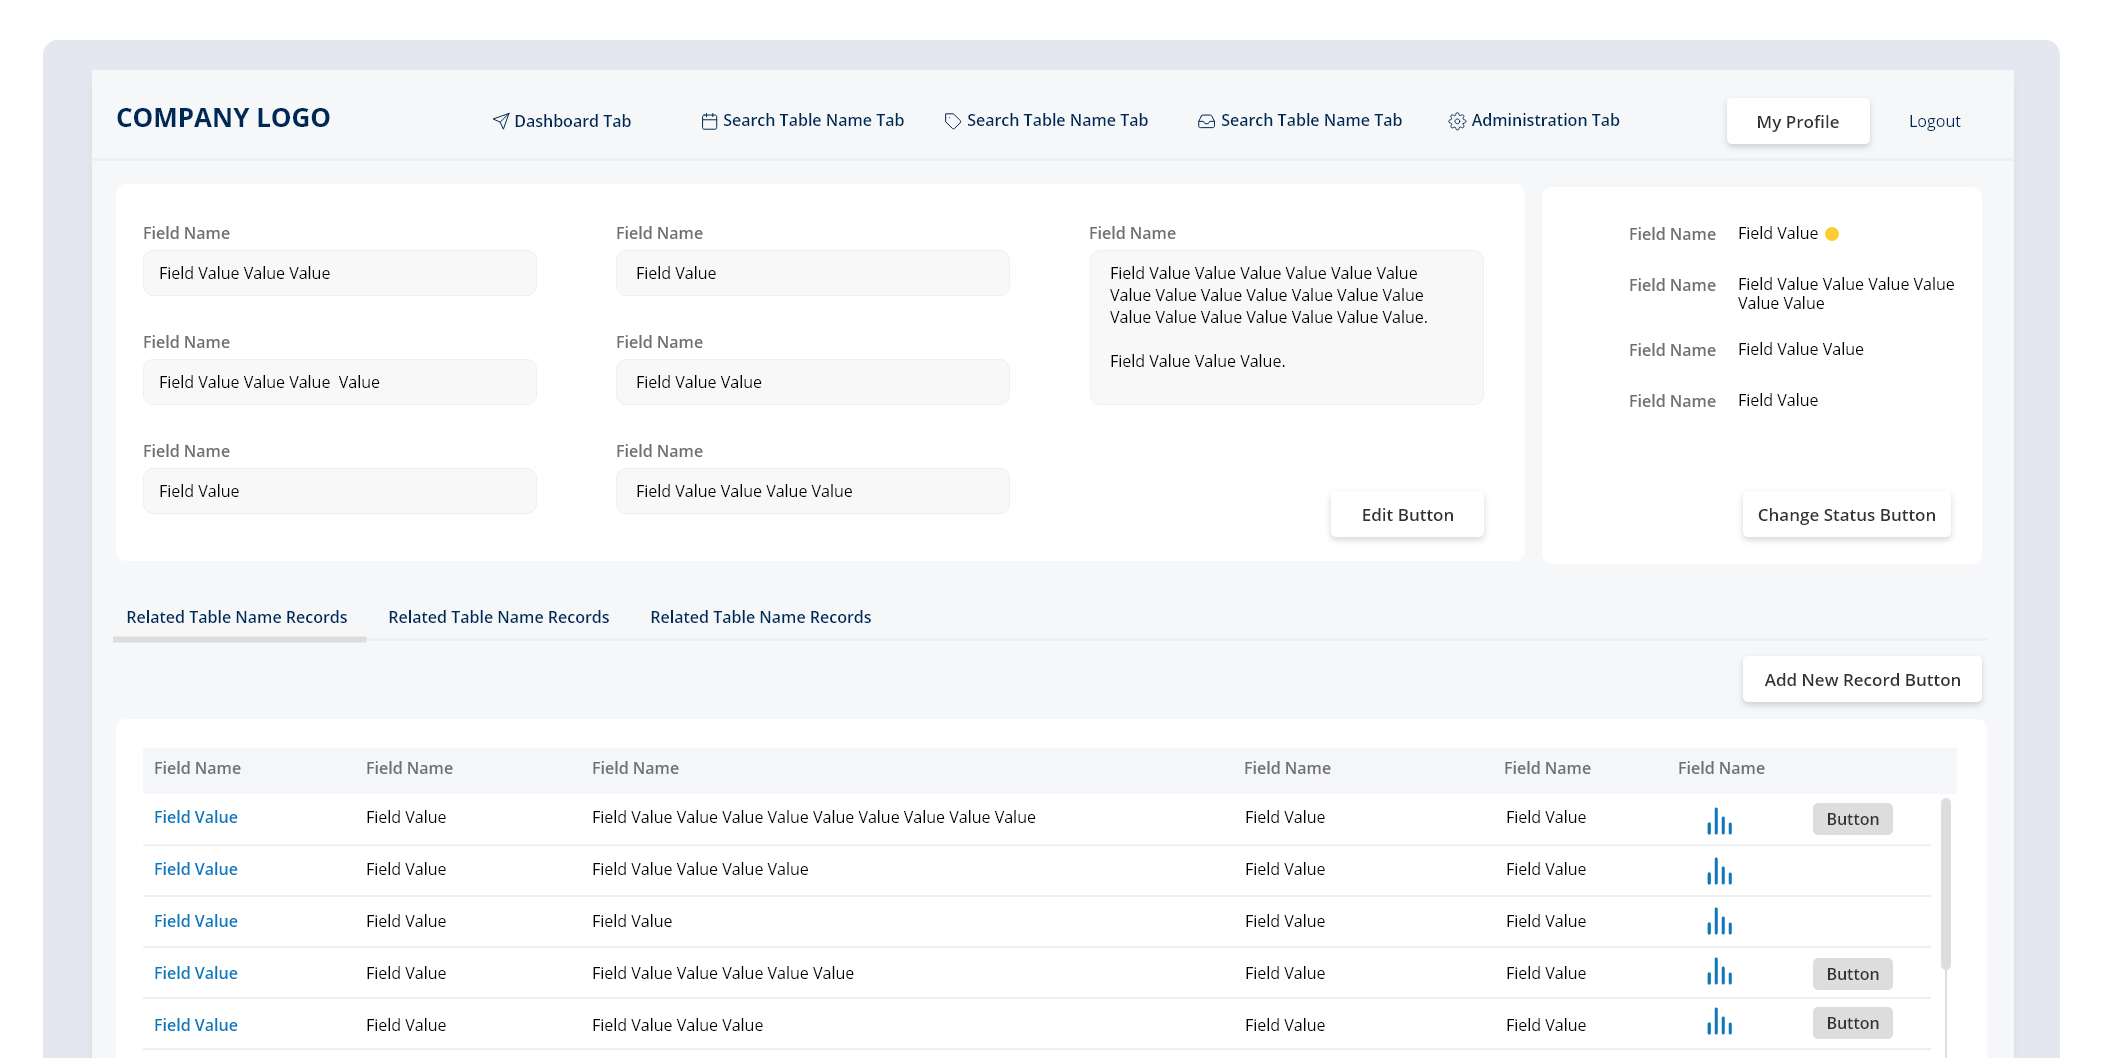
View/Edit Pages
For each record in the Search List, you will want to link to a View/Edit page for that record. Usually, these pages launch in a “modal” which means a form of popup on the page, preserving the list form in the background. However, you can also load the View/Edit page “inline” meaning the background of the pages refreshes to display the View/Edit page. If you load it in a modal, then closing the modal will put you right back at that list. If you load it inline, then you would need to hit your “back” button to go back to the list.
Each View/Edit Page can contain the same basic structure: (1) a “Details” area, and (2) a list of related records.
Details Area
This is just a container at the top of the page that holds all the basic fields of data about this record. So, in the case of our Employee View/Edit page, it would be a section at the top that contains the first name, last name, address, phone number etc. fields.
Lists of Related Records Area
We want to show lists of all of the related records. So, we start by adding a “sub tabs” navigation element, and we create a sub tab for each related table. We are specifically looking for the tables whose relationships tell us that there are many of the target table for each record, so that a list makes sense.
If the target table (target meaning looking across the relationship at the table on the other side) only has a single record then a list is not needed. Instead, a drop down field that loads the records from the target table and allows you to select only one is then most appropriate.
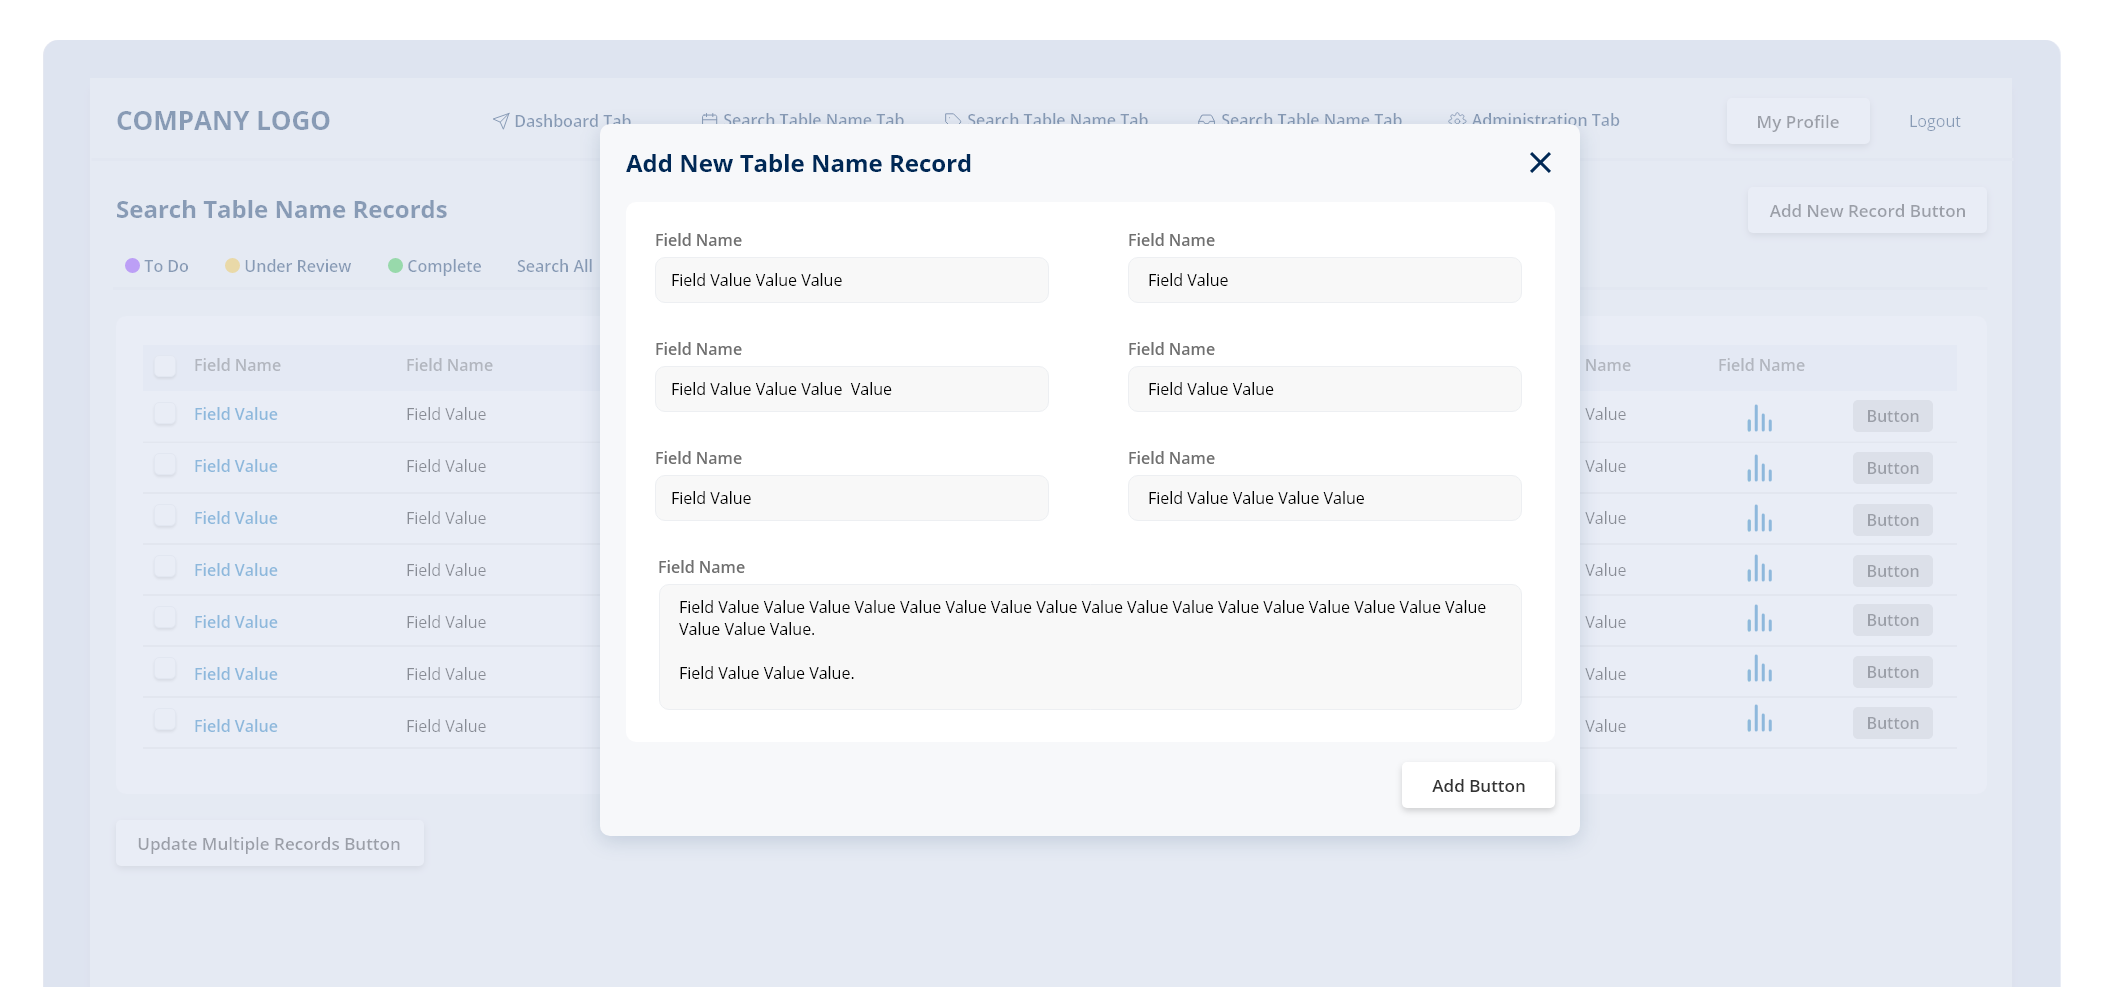
Add Pages
We need to be able to add records to the database and we do this using the Add page. The Add page is typically NOT the View/Edit page because there are elements of the later that we don’t want to show on the former, for example the Lists of Related Records.
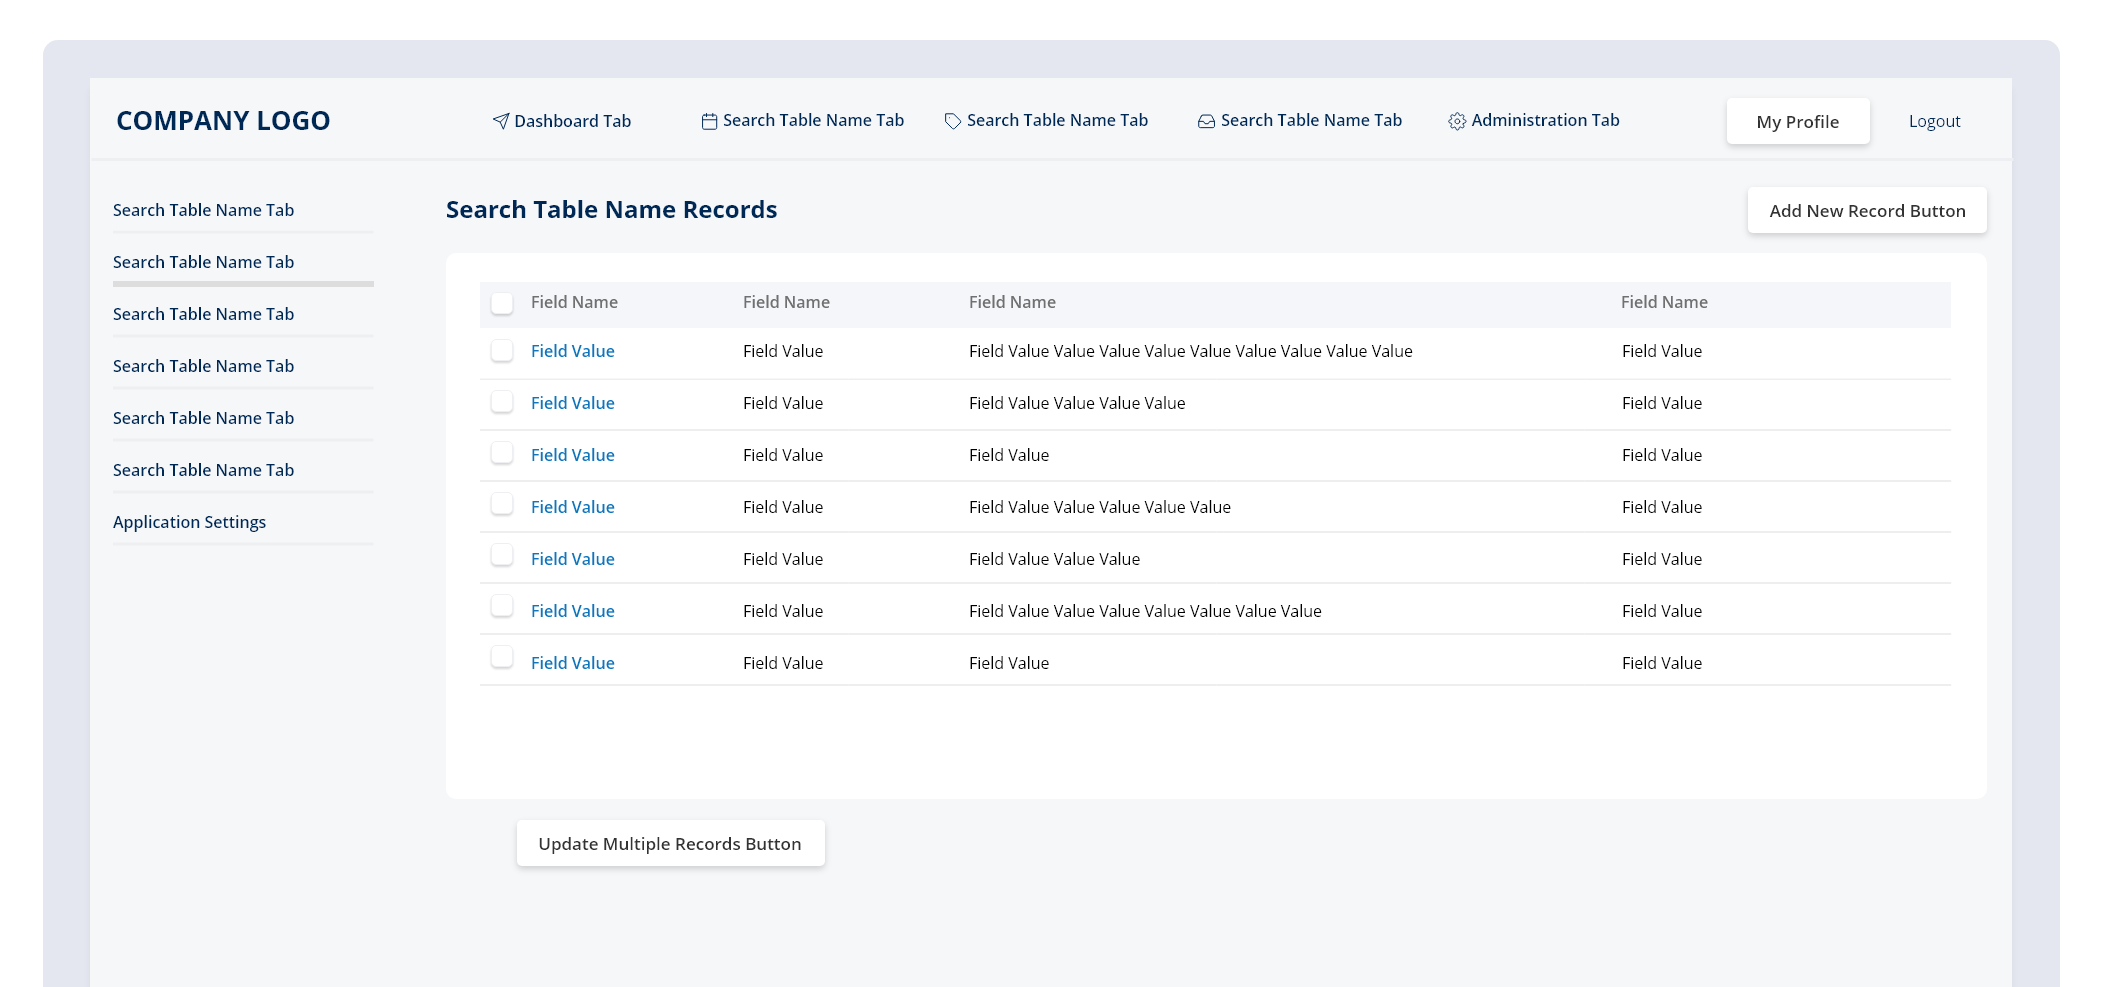
Administrative Area
If you have tables that you don’t want to include in the top level tabs, then you can bundle those interfaces in the Administrative area. Typically, the Administrative tab, or “Admin” tab, shows a list of links. Each link loads a Search Page for the target table either in a modal or inline. From the Search Page, the behaviors to add, edit and delete would all be similar as above.
Step 3: Logic Layer
The next step is to start folding in any complex logic. This application will use logic to have links authenticate users, to launch pages, or to manage relationships between tables, but is generally free of logic otherwise.
Step 4: Employee Portal
The easiest way to make the employee portal is to just use the employee record as the target destination for the employee; it already contains the employees details at the top, and a sub tab navigation with the lists of all the related records below.
First, in the User Table, add a field for “is administrator”. Then, in the authentication logic, add a check for whether that box is checked. If it is NOT checked, then simply load the “current users” View/Edit Page at log in. That page will serve as an excellent single page portal for that employee for the time being.
Then, on that page itself, make sure and adjust parameters for which fields can be edited by the employee, and which are administrator only. You do this using the “Visibility” controls in the presentation layer. You will want to trace through the sub-tab lists and their view/edit pages similarly.
Conclusion
In truth, it’s harder to design your full stack no code application than it is to build it. Using the CitizenDeveloper tools is easy. But being able to think like a developer does require some practice. You have to think about data layer, presentation layer and logic layer, and you have to learn the best practices of each. That said, if learning the above is 1 unit of effort, then learning to do the above AND in a code environment is 100 units of effort, so, full stack no code is much much easier then full stack development!